Monday, March 24, 2014

Veg Base

         This is just about the easiest thing I make and I use it for all kinds of things. It's a vegetable base that I use for soups and stews. With it I will share the two recipes I use it most for, Minestrone and Tortilla Soup. I find that it works especially well with these two soups in particular. It also works well as a soup just by itself, just add a can/cup of beans in there for some protein and you are all set. I also take a cup of this and blend it up to throw in my pasta sauce recipe, gives it a nice flavor profile without a lot of effort.

Veg Base
3 carrots, small chop
2 stalks celery, small chop
1 large onion, diced
3 cloves garlic minced
1/2 head cabbage, chopped
1 head broccoli, cut into bite sized pieces
1 quart water
1 quart veggie broth
2 Tbsp. no salt seasoning (I use the organic stuff from Costco, its awesome.)
1 C. crushed tomatoes
2 Tbsp. EVOO
salt and pepper to taste

Take a large pot and heat the EVOO up and add carrots, celery and onion, once translucent add cabbage, then add water and garlic, let simmer for 5 minutes, add remaining ingredients and let simmer for 20-30 minutes or until veggies are soft enough to be pierced easily by a fork.


Tortilla Soup
Veg Base
1 C. frozen corn
1. C cooked brown rice
1 1/2 C. cooked black beans
1 C. chunky salsa
1/4 tsp. cumin
1/2 tsp. chili powder
1 Tbsp. lime juice

Add ingredients to veg base and let simmer for 15 minutes. Add additional water if necessary. Serve with tortilla chips,  vegan sour cream and cheese.

Minestrone Soup
Veg Base
1 can tomato paste
1 C. cooked garbanzo beans,
1 C. cooked great northern beans or kidney beans
1 C. frozen green beans
2 C. spinach, roughly chopped
1 zucchini, sliced and quartered
1/2 C. seashell pasta
2 tsp. dried basil
1 1/2 tsp. dried oregano

Add ingredients, except for tomato paste, to veg base and let simmer for 20-30 minutes or until pasta is cooked. Add tomato paste, stir to combine, if there is not enough liquid add water. Serve with crusty bread and vegan Parmesan cheese.


Saturday, February 15, 2014

Mushroom Stroganoff

        Lately, it's be cold here, like unbearably cold, the kind of cold that makes you want to crawl into a fire, or hide in a fort and not come out until it is spring and the grass is green again. UNFORTUNATELY, I can't do that. I don't think anyone can do that. The one thing that I have found that fixes the unshakable cold that settles in my bones, is hot comfort food. Soups, stews, hot in the pan meals that warms not only your body, but your soul. I have been making these like mad, hoping to chase the chills away. This is one of my favorites. My grandma always made it with beef, but let's face it, I'm not going to be eating that any time soon. Mushrooms, however, I have found make the perfect replacement, meaty and juicy, they satisfy the "meat" need that people crave. My grandma ate this, and even though it might be the dementia showing, she said this was good and she didn't realize there wasn't any meat in it. So win for me! So here it is, the Gluten-Free, Vegan, Stroganoff recipe.

Mushroom Stroganoff
Serves 4
8oz mushrooms, you can use baby bellas or buttons or a mix, roughly chopped
1/2 c. red wine 
1 Tbsp. olive oil
2 Tbsp. Bragg's Liquid Aminos
2 cloves of garlic, minced
-Mix everything together in a baking dish and set aside for 30 minutes to marinate. 
-Pre-heat oven to 400 degrees and put covered dish with mushrooms in.
-Bake for 20 minutes. Remove and set aside.


In another bowl mix together;
8oz vegan sour cream (I use a cashew sour cream I make myself, but any kind will do, I suggest Follow Your Heart)
1/2 c. water
2 Tbsp. minced onion
2 Tbsp. Gluten-Free flour mix
2 tsp. no-salt seasoning mix ( I use this organic blend from Costco that is delicious!)
1/2 tsp. sea salt
1/4 tsp. garlic powder
1/4 tsp. basil
1/4 tsp. fresh cracked black pepper
-Mix together and set aside.

On medium-high heat, take a saucepan and heat 1-2 Tbsp. EVOO, add mushrooms and liquid, and then add sour cream mixture. Cook until mixture thickens slightly, about 8-10 minutes. If mixture becomes too thick you can add some water to thin it out.

Pour Stroganoff over gluten-free noodles and top with green onions. Enjoy!


Monday, April 15, 2013

Sweet Corn Tamale Cakes

      This is a recipe that I have fallen in love with, reason being, I used to work at The Cheesecake Factory, and since I was a vegetarian, I would order these at least once a week. Once I moved on from that job, I would still make these, but not often, as they were a bit time consuming. 
      The only reason these aren't very time consuming for me now, is because I short-cut it. I almost always have a fresh container of pico de gallo and salsa verde ( salsa verde recipe) in my fridge, and if not there I have a canned jar in my pantry and I always have the raw ingredients on hand.  So the only thing I really have to make is the southwestern sauce and the cakes, which is super easy. You can always use the original recipe which is right here ----->Sweet Corn Tamale Cakes and use the recipe for the pico and salsa verde that is on there as well!


Sweet Corn Tamale Cakes
makes 8 medium sized cakes

1 1/2 sweet corn, fresh or frozen
1/2 c. vegan butter (I use Earth Balance.)
3 Tbsp. vegan sugar (I use coconut sugar.)
1/8 tsp. salt (It's a pinch of salt, if you don't have a 1/8 tsp. I have actually never even seen one.)
1/2 c. GF masa harina (It's just corn flour but could be CC if made in a wheat-processing facility. I haven't had any problems with mine.)
2 Tbsp. GF Flour Mix (I use my own without any gums.)

Preheat oven to 400ºF. Puree 1 c. of corn in food processor and add butter, sugar and salt, combine until smooth. Add masa harina, and GF flour, and mix until smooth. Mix in remaining corn by hand. On a parchment lined pan, measure out 1/4 cup sized patties and make into 2-3 inch patties. Put into oven and bake for 20-25 minutes, or until browned on one side, then flip and bake for another 5-7 minutes until other side is browned. 

Southwestern Sauce
1/2 c. vegan mayo (I use veganaise.)
1 tsp. white vinegar
1 tsp. water
3/4 tsp. vegan sugar or agave (I use coconut sugar.)
1/4 tsp. paprika
1/8 tsp. cayenne pepper
1/8 tsp. onion powder
salt and garlic powder to taste

Mix everything together in a small bowl and chill in fridge.

Optional toppings: Sliced avocado, cilantro.
Enjoy!!!


Sunday, April 14, 2013

Sourdough Starter and Pancakes

I love pancakes. There are probably few things in life better than waking up on a Saturday morning and getting breakfast. I love breakfast, actually, no I don't, I love brunch. Anything that happens before I get out of bed at 9am is usually lost on me. I typically don't get my day started, I mean up and ready to get stuff done, until around 10. I realize I am fortunate enough to be able to do this. Anyways, this have given me plenty of time for the perfect GF and Vegan pancake. The thing is, the big secret, is the sourdough starter. It really makes these pancakes special. Honestly, with real maple syrup and butter they are better than donuts, and hot GF donuts are a-maz-ing! Anyways, yes this recipe requires extra work, but believe me, when you eat them, you won't care. You can even make a double batch and freeze the rest, how cool is that?

First things first. Make this Starter recipe on Monday if you want pancakes on Saturday, you will thank me later, as the starter needs to sit for 3 days before you can use it.


Sourdough Starter

1 c. water, needs to be between 110-115ºF
2 1/4 tsp. or 1 packet of yeast
1 1/2 c. rice flour or GF Flour (Do not use a mix that has any gums in it.)

 Mix and store in a 1 quart or larger container. *Do not use a metal bowl or spoon*. Cover loosely with plastic wrap and let stand for 3 days, mixing 2-3 times daily. After day 3, either use, refrigerate, or replenish.
 To replenish, add; 
1 c. warm water, below 115ºF
1 1/2 c. rice flour or GF Flour (Do not use a mix that has any gums in it.)
Let sit someplace warm for 12 hours. Ready to use afterwards, just make sure you leave at least 1 c. of starter for future recipes. 


Sourdough Pancakes
makes 1 dozen regular pancakes

1 1/4 c. sourdough starter (see recipe above)
1 Tbsp. oil
2 Tbsp. vegan sugar (I use coconut sugar.)
3/4 c. non-dairy milk (I use almond milk.)
1 GF Flour Mix (I use my own, but I'm sure Bob's Red Mill or Better Batter would work)
2 1/2 tsp. baking powder
1/2 tsp. baking soda
1/2 tsp. salt
Optional- 1 cup mix-ins (Mix-ins can be blueberries, bananas, chocolate chips, nuts, whatever you want. I used blueberries)

Mix together the wet ingredients; starter, oil, sugar, and milk, together in a large bowl. In a smaller bowl, whisk together dry ingredients; GF Flour, baking powder, baking soda, and salt. Add dry mix to wet mix and stir to combine, should be batter like. Fold in mix-ins, if any. 
Over medium-low heat, oil pan. Pour batter onto the hot pan and cook until brown, then flip. Continue for each pancake, until all batter is used. 


Monday, April 8, 2013

Sweet Potato Tots with Dipping Sauce

       I LOVE tots, actually I'm pretty sure any person in my generation loves tater-tots, and if they don't, they might be an alien. There is something about those warm, crisp, golden nuggets of potato that will always, ALWAYS, make me feel better. Bad day? Have some tots! Not feeling well? Have some tots! Seriously, if you knew the amount of time that I have spent on trying to find tots/eating tots/talking about tots, you would think I have a problem. A hot-tot problem. And well.... I kind of do. I already knew how to make tots with regular potatoes, but a bit ago I went to a restaurant and they had sweet potato tots. Wow, you can imagine the emotions went through me at that point. I love sweet potatoes, and now you are telling me that they make tater-tots out of them? Why wasn't I informed? Who kept this secret from me? Anyways, it was love at first bite, and I knew at that moment I needed to make my own.
      So my main thing that I try to do, cooking-wise, at least, is take a regular recipe and make it into a GF/Vegan recipe. That's what I did here. This is the original recipe -----------> Sweet Potato and Bacon Tots with Creamy Mustard Sauce. Obviously, me being GF and Vegan, I couldn't keep the recipe the way it was, so I changed it, and it turned out amazing! It's a bit time consuming, but so worth it. I also suggest that if you make it, double the recipe and flash fry/freeze half to put into the freezer and then you can bake them just like you would with store bought bagged ones.


Sweet Potato and Coconut Bacon Tots 

2 large sweet potatoes
3 Tbsp. coconut bacon (aka Facon)
1/2 tsp. salt
3 heaping tsp. gluten-free flour
1 tsp. flax meal
3 C. oil


Boil sweet potatoes for 15 minutes, then pulse in food processor until chopped finely. Or shred on box grater. Put sweet potatoes into a clean and dry dishtowel and wring out water from potatoes. 
Add the coconut bacon, salt, flour and flax meal and mix well to combine.
Roll into a small log and cut into tater-tot sized pieces.
Heat oil to 300 degrees F. Working in batches, fry tots until golden brown in color. About 2-3 minutes. 
Sprinkle with salt while still hot. Serve with sauce (recipe below) or sometimes I wait for them to cool down some more and sprinkle some powdered sugar and cinnamon on top of them. Totally turns it into carnival fried junk status but with less guilt, because it's still a sweet potato.

Creamy Vegan Mustard Sauce 

3 Tbsp. vegan mayo
2 Tbsp. maple syrup (honey works too, if you eat honey)
2 Tbsp. Dijon mustard 
salt and pepper to taste

Mix together ingredients until smooth and keep in fridge until ready to eat.

Thursday, April 4, 2013

GF/Vegan Chex Mix

      I have been absent, but I have been active. I have been working on jewelry, purses, and still cooking, all while trying to get into the spirit of spring cleaning. We finally have nice weather here and the sun is out and frankly, I am so happy to just spend time outside I have been neglecting my blog. Recently, I've been making a lot of snacks to keep me going and this is another one of them. I'm actually kind of obsessed with this stuff, seeing as Chex Mix was one of my favorite snack foods pre-GF. This satisfies my cravings for salt and I believe it is healthier because instead of butter I use an Earth Balance/Coconut Oil mix. Keep in mind, this is a snack food, meant to be snacked on, not made a meal of. Keep that in mind, I know that it can be difficulty, especially with this stuff, but just because it is GF and Vegan doesn't mean it is automatically 100% good for you.

 Gluten-Free and Vegan Chex Mix
Makes 10 cups
 
1/4 C. coconut oil
1/4 C.  Earth Balance buttery spread
2 Tbsp Bragg's liquid aminos or GF/Vegan Worcestershire Sauce
1 tsp. seasoning salt
1/4 tsp. garlic powder or 1 clove garlic, minced
1/4 tsp. onion powder
3 C. Rice Chex
3 C. Corn Chex
2 C. popped popcorn or more Chex
1 C. mixed nuts
1 C. GF pretzels or I used my homemade GF/Vegan Cheese crackers

      Pre-heat oven to 250 and melt coconut oil and Earth Balance in a roaster pan. Mix together all the spices and add to the oil mixture. Add all Chex, popcorn, nuts, and crackers into a bowl and mix together and add to roaster pan with spices and coconut oil. Stir to coat Chex mixture, bake at 250 for 45min-1hr, stirring every 15-20 minutes. Let cool, on paper towels to absorb excess oil, then store in airtight container. 

Will keep for about 2 weeks before going stale, if you can keep it around that long. Enjoy!!


Tuesday, March 19, 2013

Simple Cucumber Salad

      This is another one of "those" recipes that I have been eating since I was little. It's a staple in my household because; a)it takes like no time to make, b)the ingredients are always on hand, c)it's really good. There is actually a container of it in my fridge at all times, just in case the grandma gets hungry and feels the need to eat something. It's not going to fill you up, it's a side dish, not a meal, so it also works well as a snack. It's 3 ingredients, 5 if you include the salt and pepper, which, pssh, I don't. The part that takes the longest is peeling and grating the cucumber. If you don't think that's easy then you should probably just hire a personal chef at this point, no offense. 

Simple Cucumber Salad
serves 4
1 cucumber, peeled and grated
4 Tbsp. vegan sour cream
4 Tbsp. vinegar (I usually use white or apple cider, they seem to work the best.)
salt and pepper to taste

Mix grated cucumber, vegan sour cream, vinegar. Salt and pepper to taste. 

      No seriously, that's it. Enjoy!!

Monday, March 18, 2013

Cabbage with Facon and Noodles

      First off, I am a big fan of noodles. I love carbs, (I think I have said this before..), pasta, bread, cookies, cake, potatoes, you name it, I will most likely eat it. I'm Czech, so, I think that has a bit to do with it. Mmmm, dumplings!! This is dish is probably one of my top 10 favorite things to eat of all time. To me it is comfort food, and with the wind howling outside and the lack of sunshine, I'm in need of some comfort. (Spring? Where are you?) It is like 5 ingredients, which makes it really easy to make. You know I love easy! My grandma would make this with bacon, egg noodles and sour cream instead of the coconut bacon, GF shells, and vegan sour cream, so you can go that route if that's what suites you. So without further ado, I give you Cabbage with Facon and Noodles! *coconut bacon is now called facon for all general purposes because that's what my friend Stephanie calls it and she said I can't call it bacon. I will not argue with her, she will probabaly beat me up, just kidding, I hope.*

Cabbage with Facon and Noodles
serves a lot, at least 4, I make a quarter of this recipe and it is a VERY generous portion

1 head cabbage (shredded or diced)
1 medium onion (diced)
1 Cup facon (fake bacon, I use my coconut bacon)
1 lb  gf noodles (I use whatever GF noodles I have on hand, today it was shells)
1 container of vegan sour cream (I have also used vegan, unsweetened yogurt with good results.)
1 Cup water (optional)
salt and pepper to taste

Boil noodles according to directions on the packaging. Drain and set aside.
In a large saucepan, add some olive oil and saute cabbage and onions until wilted and very tender. When cabbage/onion mixture is done, add noodles, facon, and sour cream. *If you do not have enough sour cream you can add water to get to the consistency you want, heck, use veggie broth.  I have never had this problem but I see how it could happen* Salt and pepper, and heat until sauce is constancy you like and everything is heated through. 

Enjoy!

Wednesday, March 13, 2013

Coconut Bacon, my new obsession

      I have a slight obsession with all things bacon, well let me rephrase that, I *USED* to have an obsession with bacon. This seems to be a very American thing to be obsessed with, as proof from bacon chocolate, bacon doughnuts, bacon candy, bacon scented candles and so on and so forth. I am vegan, so bacon is a no-go, even vegan bacon is a no-go as usually it's made from seitan, which *insert sad face here* is my enemy. So I thought bacon or anything bacon tasting was going to be a relic of my past, and when I smelled it, it would bring back memories of nostalgia and days gone by. *sigh*
      Well, not anymore. Some time last week, someone posted something about coconut bacon and then provided this link. Coconut Bacon-The Vegan Project. I immediately saw it and tried it but meh, it lacked the flavor I was looking for. Two things I noticed, 1) It did taste like bacon but there wasn't enough coating to go around and 2) The flavor didn't seem to stick to the coconut flakes. So I played around with the ratios and I actually don't have tamari in my house because I stopped using soy sauce a long time ago. Instead, I use Bragg's liquid aminos, and it worked out well, well enough that I am posting the recipe to you folks. So here it is Coconut Bacon, YUMMMMMM!!

Coconut Bacon!
I don't know how many it serves, because I eat it by the handful. Sorry, I'm not sorry.
2 C. large unsweetened coconut flakes 
2 Tbsp. liquid smoke (hickory flavor worked out great!)
4 Tbsp. Bragg's liquid aminos
2 Tbsp. water
4 Tbsp. maple syrup (the real stuff, not the fake stuff, it won't taste right otherwise)


       In a large Tupperware container combine all ingredients minus the coconut, put the lid on and shake to mix them together. Then add in the coconut and shake again to coat the coconut. Leave to marinade for at least 30 minutes. This helps the coconut absorb the flavor, which is what you want! 
After 30 minutes, preheat oven to 300 degrees and line two pans with parchment (I ran out of parchment yesterday so I didn't use it, but I still highly recommend it.)
     Spread coconut on the two pans, making sure you try to spread them out as evenly as possible so the flakes don't stick together. Bake for about 15-20 minutes, and check on it every 5 minutes or so, you want a light brown color, and the coconut will continue to crisp for a little bit even after you pull it out of the oven. This stuff even smells like bacon!
 Twice baked vegan smashed potatoes with Teese Cheese and Coconut Bacon! Yum!

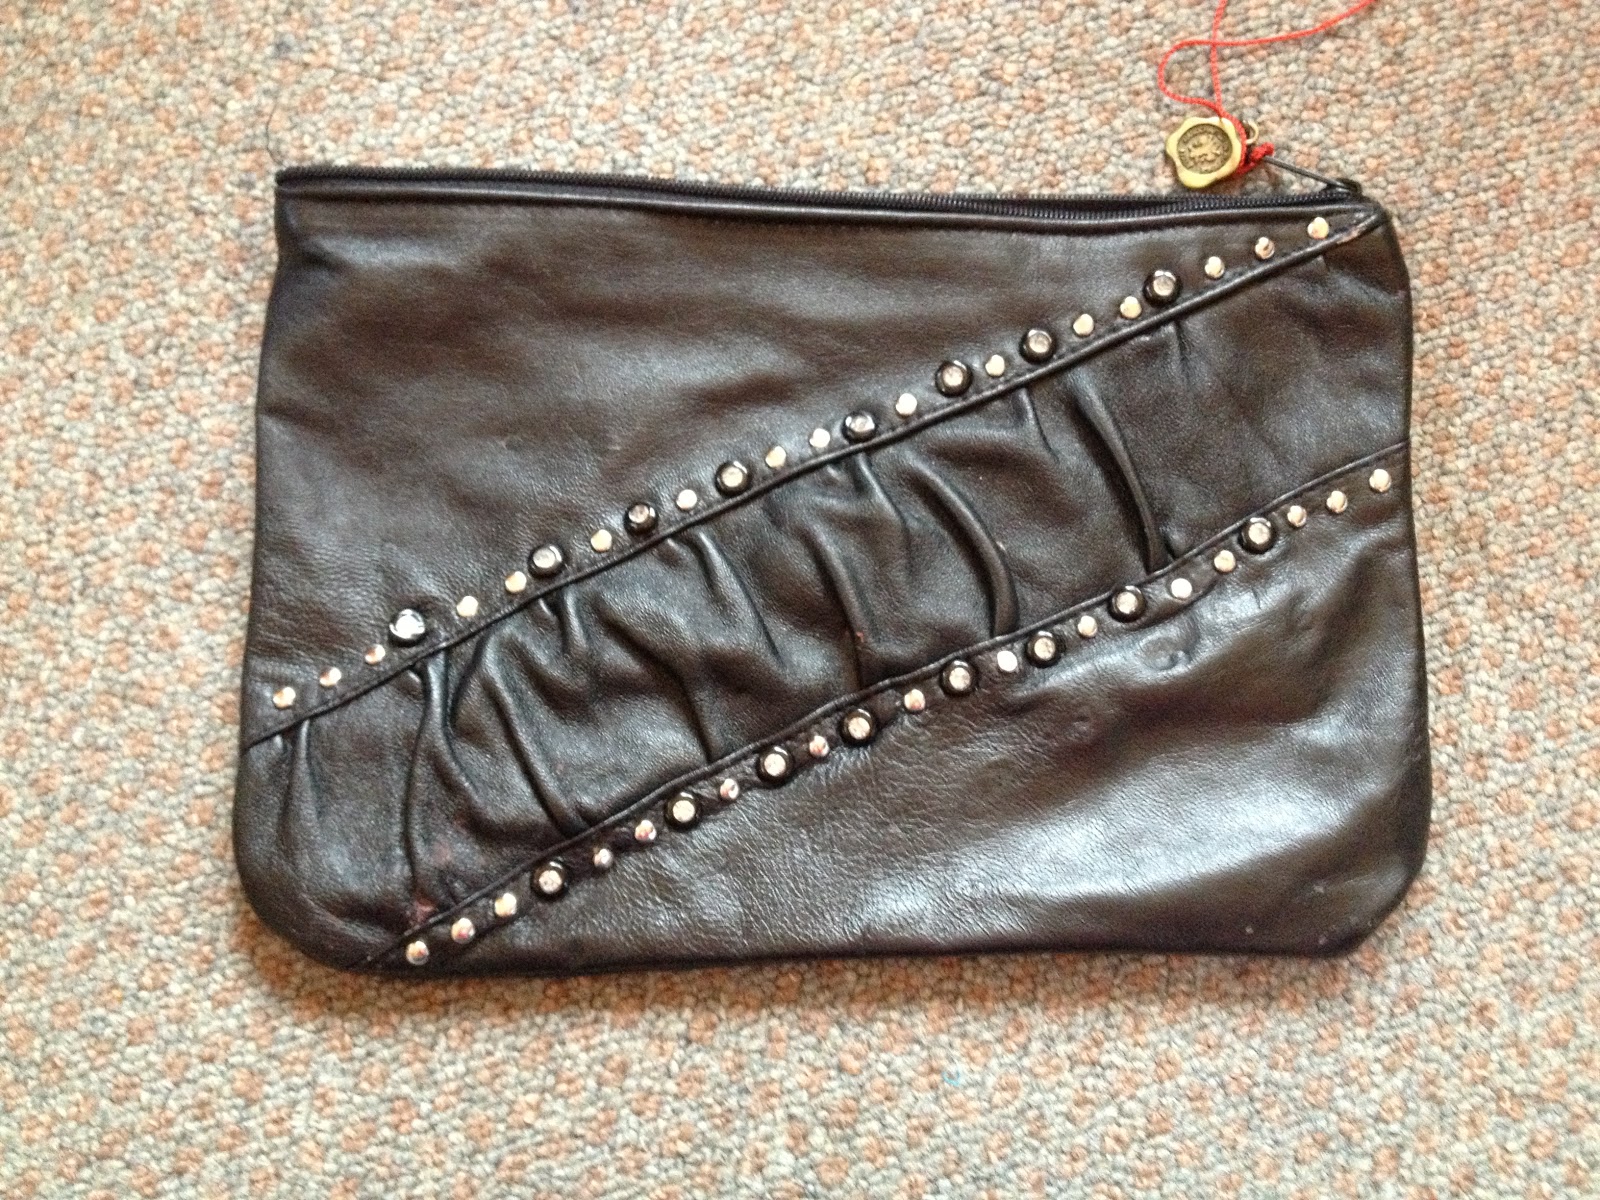
      So, I got some of the studs I ordered in the mail, and I decided the play around with them and created this. It is FAR from perfect *has a couple of little tears and some of the studs are off centered*, although it is vintage, so the tears are kinda expected. My bad studding is me learning how to work the studs with are more complicated then my usual prong studs. So meh, I might use this as a giveaway or something, I dunno yet. I am not sure if it is vegan, I think it is because if it is real leather it is really thin, and I try not to buy real leather things to stud. Even though it's upcycled, I still prefer the things I buy to be vegan, but I'm not going to hate myself over it. and hope no one else does either. 

Tuesday, March 12, 2013

Sweet Smelling Dry Shampoo Spray

       Today I decided that I was going to make one of the various things I pin on pinterest so I made some homemade dry hair shampoo. I am in LOVE with it, and it so cheap to make. Plus, I know what's in it, so that makes it gluten-free, vegan (cruelty-free), plus it isn't in a aerosol can, which is why I am posting it up here for you all to try. The only thing I did different was put in a few drops of lavender essential oil, which made it smell great.
Dry Hair Shampoo That is the original recipe, I added in the essential oils, so here is my recipe reflecting that.
Sweet Smelling Dry Shampoo Spray
3 Tbsp. cornstarch
3 Tbsp. alcohol
12 Tbsp. water
3 drops of essential oil of your choice

       Put into a spray bottle (extra points if you reuse an old spray bottle!!) and mix well before each use. Basically, you don't want to drench your hair with it, you just want to make it damp. At this point you can either blow-dry it, or if you are like me, let it air dry. I seriously did not think this stuff was going to work, but it did and it's awesome! Enjoy!

Pizza Party!

I love pizza, pre-vegan GF days you could easily find me putting away a whole frozen pizza by myself on a Friday night. This was yet another thing I had to give up when I was diagnosed with Celiac's. However, I have been lucky enough to find that Aurelio's makes a GF crust and it is really good. I get mine with their spinach, onions and mushrooms, no cheese. Unfortunately, that pizza costs me around $18, for a small, which means I only get it as a treat, or if my momma decides to order one for me when I come over. I then decided that this was totally not acceptable, so I started looking for a gluten-free pizza crust. Most recipes ended up with chewy dough, or dough that was hard to work with and it really was starting to bum me out. That was until I decided to take a couple recipes and just take the parts that did work and add them together, and wala! Instant pizza crust success! I am so happy, I finally can make pizza in my own home and top it with whatever I like. The dough also freezes, so I can make a bunch and then take out a crust whenever I feel like it. AWESOME!!!
So here it is, my pizza crust recipe. 
Gluten-Free and Vegan Pizza Crust
makes 4 individual pizzas or 1 large pizza
1 Tbsp. ground flax seeds
3 Tbsp. hot water
4 tsp. active yeast
2 tsp. sugar
1 1/4 C. warm water (separate 1/2 C. to mix with yeast)
3 Tbsp. olive oil
1 1/4 C. rice flour
3/4 C. soy flour or sweet sorghum flour
1 C. tapioca starch
1/4 C. potato starch
1/4 C. cornstarch
2 tsp. xantham gum or guar gum
1 tsp. sea salt

In a small bowl mix together flax seeds and hot water, stir to combine and set aside.
In another small bowl mix yeast, sugar and warm water together, stir to combine and set aside, while you mix together the dry ingredients. The mixture should get nice a bubbly, if it doesn't you have bad yeast or the water was too hot. If this happens just get new yeast and start all over again.
In a large bowl (I use my mix master bowl) combine all dry ingredients, make sure they are thoroughly combined. 
Put the bowl on your mix master and with the dough hook, add the flax seed mix to the dry ingredients. Add olive oil and yeast to dough mixture as well. Dough will start to get crumbly.
Add remaining 3/4 C. of water in 1/4 C. increments to the dough mixture until it starts to come together and forms a dough ball. Let mix master knead dough for about 5 minutes. 
Let the dough raise in a warm place for 1 hour. 
After the hour, preheat the oven to 450. Oil and put cornmeal on the bottom of pizza pan you plan to use. I just bake mine on parchment.
Roll out the dough between two pieces of parchment to get the crust. If you like it thin roll it out thin, if you like more of a pan pizza, you can roll it out and then press it into a pan. I divide mine into 4 equal size balls and each one makes an individual size pizza. Let pre-bake in an oven for 5-10 minutes
Then top with whatever kind of sauce and toppings you want, and put back in until cheese is melted, or another 10 minutes or so!

I put marinated spinach, onion, zucchini, and sweet bell peppers on mine and top it with Teese Mozzarella Vegan Cheese. Yummy!!! Also, I love garlic butter crusts, so I add some melted earth balance and garlic powder to the crust with a pastry brush. It really makes the pizza go from yum, to WOW! Enjoy!

Sunday, March 10, 2013

Restaurant Review: Urban Vegan

      Today, I'm going to let you in on a little secret. The secret is, Chicago has some of the greatest vegan/vegetarian restaurants ever! So, this year, I have made it my mission to try every single one of them. So today's review is on Urban Vegan.
      First off, we (my friend Delia and I) went there and it kinda looks like a hole in the wall kind of place. DO NOT let that fool you, there is greatness inside! We walked in and were told to seat ourselves. The place is kinda small with only about 6-8 tables in it and you can see directly into the kitchen (which I LOVE). Each table has soy sauce and Bragg's liquid amino's on it and from that point on I knew I was in heaven!
      The menu itself is huge, and here's the thing, it is ALL vegan, every single dish is vegan. So there is no asking to take this out or what's in this. (Well, I still have to ask, because of the celiacs and all.) They have lunch/dinner specials that include salad and spring rolls, and they have gluten-free specials!  Also, you get complimentary miso soup when you sit down, how cool is that? So we got our miso soup first, and it was good and since it's still winter in Chicago, this was very much appreciated! We also got tofu satay as a starter. The tofu satay is very much like chicken satay, or unchicken satay which they also have, but the tofu satay is GF (not sure about the peanut sauce though). This was absolutely amazing, the coconut curry it was dipped in was fantastic and the peanut sauce was to die for! My friend didn't finish all of it and put it to the side to put on her main course it was so good! For our main dishes, I ordered the spicy noodles dinner special with extra broccoli and my friend ordered basil fried rice.  First off, the spring rolls (not GF, I cheated, oh well), were fantastic, they were crispy and crunchy and filled with deliciousness, the dipping sauce they came with was good as well. So those were definitely a hit. The salad that came with mine had, honestly, THE BEST, vegan salad dressing I have ever had in my life. I do not know what's in it, nor do I care. I want a whole bottle (or two) of it to put in my fridge. Maybe I will ask them to do that when I go there next, there's an idea... Either way amazing. So then I start eating my main dish, and you know that point when the food is so good you stop talking?  That's where I was, actually that's where everyone was. There were 3 other tables there aside from us and once people were eating, there was very little talking going on. Now, I don't know about you, but when people are so busy eating that they aren't talking, that means the food has to be down right fantastic, and it was. My food was even hot (temperature wise), and that did not stop me from continuously trying to shovel more of it in my mouth. The spicy noodles (aka drunken noodles), were spicy but not too spicy, had a great vegetable, noodle, to sauce ratio and blew my mind. My friend's basil fried rice was the same, now, the brown rice is really vibrant, so don't let that freak you out, it tastes really good. Also, I don't think they have white rice in the place, so yay! White rice isn't healthy anyway. 
My delicious dinner!

      So food wise, I love this place. I'm pretty sure it has become my new favorite, and that place was held by The Chicago Diner before, but since The Chicago Diner's GF menu is kinda lackluster (I try so hard to like it, but their GF menu is like 3 items, and once you have had all 3, you get extremely bored). Also, the location is easy to get to, and though seating is limited, it wasn't a problem when we were there. It has street parking, so it was easy to find parking. The waitstaff was so nice, kept up with water refills, answered questions, really helpful, and it isn't expensive, it's actually very reasonable for the amount of food you get and the quality of the ingredients. So, I suggest you try it. Also this is one of the only places I have seen that has like 5 different choices of mock meats, they have soy chicken, soy pepper steak, seitan, tofu, soy fish, soy shrimp, it kinda blew my mind even though I'm pretty sure everything but the tofu has wheat in it. I'm not sure on that though and will definitely have to ask next time I go there, because let's face it, with food that good, there is no way I'm not going back there!


Also, my friend sent me this goldmine today! Thanks Kelly!


Friday, March 8, 2013

Tofu Scrambler

      Sorry I haven't posted anything this week. It's been pretty busy over here and I didn't have my computer for two whole days. I know I said I would post my vegan pho recipe and I will but I'm not sure where I put that recipe, so bear with me. Instead, I am going to be giving you my favorite vegan meal of all time recipe. This is pretty basic as far as being vegan goes. Before I went vegan I thought I was going to miss scrambled eggs. I actually can eat eggs, I just choose not to. Cheese and Eggs were the two hardest things for me to give up when I went vegan. Eggs to me are a comfort food, when I was sick as a kid my grandma would make me scrambled eggs on toast or egg in a hole. Yum.
      Now, when I went vegan I knew I would have to find something to replace it and sure enough, this did the trick. It's super easy to make, it tastes so yummy and it makes me feel better. I eat a tofu scrambler at least twice a week and whatever I don't eat goes into a container in the fridge. It works out perfectly because I can take the leftovers and make breakfast burritos with them in the mornings. I know the internet is crawling with recipes, and don't get me wrong, most are good (how anyone could screw up a scrambler is beyond me), but this one is mine and you know if I eat it that it has to be good. Also, experiment around, if you don't like tomatoes don't put them in there. You can add chopped garlic and Italian herbs and take out the cumin to make it Italian style. Have fun and play around with it! Anyway, here's the recipe.
Lisa's Tofu Scrambler
serves 4
1 Tbsp. olive oil
1 block tofu (crumbled, you can use firm, medium, or soft, just not silken)
1 small onion (diced)
1 C veggies (diced and whatever kind you want, I usually take whatever I have left over in the bin, or have a surplus of, today's was zucchini, carrots and bell peppers)
1 tsp. cumin
1 tsp. garlic powder
1 tsp. oregano
1 tsp. turmeric
2 Tbsp. nutritional yeast
2 Tbsp. Bragg's liquid aminos
1 Tbsp. mustard
1 tomato (diced)

Over medium heat put oil in pan and saute tofu, veggies and onion. Let cook until veggies are crisp but not hard. Add the rest of the ingredients and mix well, it should turn the tofu yellow. Serve and eat.
You can also top it with some vegan cheese (Teese if you please!), fresh herbs, or salsa. MMM soo yummy! Enjoy!

Saturday, March 2, 2013

Bliss Bites aka Fruit and Nut Bites

      I wasn't going to post anything else tonight, but I made something so great that I felt the need to share. I am fully obsessed with fruit and nut bars, Kind bars and Larabars are my favorites. Unfortunately, the one thing I don't like is the cost. So I thought I'd look at the ingredients and see if I could maybe make a mock of these and low and behold you can! It's actually really easy! 1 part dried fruit puree to 1 part chopped nuts. I actually took it one step further and added in some flaxseed meal because it's good for you. Yea, just trust me and make these already.

Almond, Cranberry Coconut Bliss Bites!

Bliss Bites!
makes about 20 melon ball sized bites
1/2 C dried fruit (I used a mixture of dried cranberries and dried apricots)
1/2 C nuts (I used almonds)
2-3 Tbsp. water
1 Tbsp. Flaxseed meal or you can use ground Chia seeds or even whole Chia seeds for more crunch!
Optional- Unsweetened coconut, finely chopped nuts, or flaked chocolate to roll bites in.

      In a food processor, chop nuts until roughly chopped, not mealy, but I'd say small pieces. If there are some big pieces in there that is perfectly OK. Put nuts into another bowl and set aside. Next put dried fruit into the food processor and pulse, once it starts sticking together you might need to add the water in by the tablespoon. This will give you a chunky paste. Add fruit paste to chopped nuts, add in the flaxseed meal and mix well. Refrigerate mixture for a half hour. Then take out and start rolling into balls, or if you are like me and kinda a perfectionist when it comes to food you can use a melon baller to get a great size. At this point you can leave them, but if you plan to take them anywhere or leave them in your purse (like I do) they can kinda get nasty if you just leave them in a bag. I roll mine in coconut, more nuts (this is more like a nut-meal), or chocolate.

     Just try not to eat like all of them in one sitting. They are healthy but come on, if you eat the whole batch it's really not that healthy. ...But if no-one is there to see it, did you really eat the whole batch?

Oh, and dude thought he would help me type up this up and by help I mean giving the computer the stink-eye. He's such a helper!

Saturday Product Review


      Today, I am going to be telling you about two excellent GF/Vegan products. I am not sponsored or paid to endorse anything so if I tell you it's good, you should probably try it. First up is the The Road's End Organics, GF/Vegan Mac&Chreese. First off, I don't eat a lot of foods that come in a cardboard box aside from cereal, and even that can be challenging. Second off, this stuff is AWESOME! It's a convenience food, that tastes excellent. To find a GF/Vegan convenience food is hard, to find one that doesn't taste like it should go back in the box and then into the garbage, is a whole other story. I will be the first one to tell you that most vegan cheese substitutes stink. There are probably like 2 brands of vegan cheese that I will eat, this is coming from a non-picky eater too! Anyways, this stuff doesn't taste chalky, it tastes creamy, and how they do it without having nuts in there is beyond me.  The texture, the flavor, everything about it is great. It really fills in the Kraft Mac&Cheese void that I have had since being GF/Vegan. I actually have a couple boxes on hand for those "lazy vegan" days. The noodles also cook really well, which is a huge plus, if you know gluten-free noodles, then you know most brands stink!  The company also offers various other products besides this, they have non-GF mac&chreese, GF/Vegan bouillons, gravy mixes, etc. Just go take a look, you won't regret it!

      Speaking of gluten-free noodles, I hate crunchy gluten-free noodles don't you? Tinkyada Pasta says right on the bag that they have a "good consistent texture" and that they're "not mushy", but would it live up to the packaging and not turn up either a crunchy or mushy mess? I am so happy to say YES!!!! These are the by far the BEST GF/Vegan noodles I have found! It's not just the elbows, either, I have tried the shells, the penne, the linguine, and not one thing has let me down. I actually can't wait to try their lasagna noodles because I miss lasagna and had yet to find a GF/Vegan version. Honestly, this stuff is fool-proof too. There are two other brands of pasta that I will buy, if I can't find the Tinkyada brand, and even with those I have had to figure out the trick to getting them just right.  I can even say I let these over-cook a little and they still weren't mushy. It's also norm-aprrover (people who aren't gluten-intolerant/celiacs), and that right there speaks volumes! So go out and buy a bag, or two, and never have to complain about an over/under cooked noodle again!
PS-The elbows and shells are what I use in my GF/Vegan Mac and "Cheese" recipe. Only the best for my Mac and "Cheese"!

Tuesday, February 26, 2013

Mac and "cheese" and the best cream base. Also, dishes are the worst chore ever!


      I didn't post yesterday because I had to take the doggies to the groomer to get spiffed up since they were looking a little ragged. This is what they look like now.


      Daawwww! Aren't they cuties? Mia is the one on the left, she's a disabled mini schnauzer who I rescued at 3 months from a puppy mill. Both of her back paws are deformed and she only has 2 toes and toenails (instead of 4). The other one is Doctor Dude, and I'm pretty sure he is mentally challenged to some extent. Anyways, enough about those two, lets talk food.
      I'm gonna pray to myself that this makes sense because I have been in the kitchen for going on 10 hours. I don't even know what I did to tell you the truth, that's where I am at right now, ha ha. I love mac and cheese, I mean, what American doesn't? I have yet to meet a person that doesn't like mac and cheese. I even remember when we would spend part of our summers in the Czech Republic my grandma would bring two things for us eat when we were there; 1)Peanut Butter 2)Kraft Macaroni and Cheese.  When my twin was in Italy for her semester abroad, I even sent her PB and the cheese packets from the mac and cheese. So mac and cheese is a USA ('Merica) staple as far as I am concerned.
      Well, when I was diagnosed with Celiac's, mac and cheese kinda went off the table, and it went even farther when I became a vegan. I actually haven't had mac and cheese up until like January when I stumbled upon a box of GF/Vegan mac and cheese at a Woodman's (BTW BEST FREAKING STORE EVER). It was like $4.50, which to me, is expensive for one little thing, (gf/vegan things cost sooo much more than the regular stuff it still shocks me to some extent), it was delicious and totally worth it.
      I am a very conscientious eater, I prefer not to use the word picky, because I eat pretty much everything (gluten-free and vegan, of course), I just like knowing where my food comes from and how it's made. Because of this, I decided to look up some vegan mac and cheese recipes, and after playing around with a couple of them and adding and subtracting ingredients I finally came up with something I liked, well, not just liked, because I kinda devoured half of it, kinda. Believe me, I spend almost everyday in the kitchen and would not post anything on here that I am not proud of. So please, please, please, if anyone makes any of this stuff, tell me if you like it! So, let's get to making some Mac and Cheese, or Mac and "Cheese", if you prefer.
GF/Vegan Mac and Cheese
serves 4, generously
1 lb gluten-free elbow or shell macaroni (I used tinkyada brown rice shells)
14 oz vegan cream (see recipe after this one)
1/2 C. toasted cashews, walnuts or almonds (I used cashews)
3 cloves garlic
1/4 C. olive oil
1 very large vidalia onion (chopped)
2 Tbsp. rice flour
2 Tbsp. Dijon mustard
1 tsp. onion powder
1 tsp. garlic powder
1 tsp. paprika
1 tsp. hot sauce (or more, I used more, a lot more)
3/4 C. nutritional yeast
2 1/2 C. unsweetened non-dairy milk (I used almond milk)
1 cup vegan cheese of your choice ( I used teese, it's awesome!)

Boil pasta according to package, drain, and set aside. *To get noodles to not stick together add a little olive oil to the pot and when water is boiling add pasta and stir for about a minute.*
Put some olive oil in a pan and saute onions over low heat until they caramelize. Set aside. (I know this takes awhile, but it is SO totally worth it). In a blender or food processor blend nuts until meal-like, then add vegan cream and garlic and blend until smooth.
In a BIG POT, over medium heat,  heat up the oil, when oil is hot add flour, mustard, onion and garlic powders, paprika, hot sauce, and nutritional yeast. Whisk everything together until it turns a medium brown color, then slowly add in vegan cream and non-dairy milk. Put heat up to high and let it cook for about 5 minutes, it should start to thicken up. 
Add pasta, onions and vegan cheese to sauce mixture and stir to cover and heat through. Salt and pepper to taste
You can eat this plain, with a vegan chili like I did. You can also add veggies and fake meat (or tofu) to it and make a casserole out of it!
chili cheese mac, amaze-balls!


Vegan Cream Base
1 container of silken tofu
1 can of coconut milk

Blend together in a food processor or blender. 

It's that easy. Also, this stuff is awesome and very versatile, you can use it to make cream soup bases, ice cream, cheese sauce, in place of cream in any baking recipe (I have actually added coconut sugar to it and let it cook on the stove to get a sweetened, condensed milk.).
Enjoy!!!


Sunday, February 24, 2013

Babi's Blueberry Slices

      I finally was able to figure out a recipe that I have been playing with for awhile. It's based off a family recipe, that unfortunately, I am no longer able to eat. I grew up eating this ALL the time as a kid. My grandma, (Babicka is Czech for grandma, hence the name), would bake a pan of it once a week and we were free to snack on it whenever. I'm not saying this is healthy, but it's way better for you then the regular coffeecake that you would buy at the store, and it has real fruit in it, so meh. It's great with coffee for those early mornings too!

Babi's Blueberry Slices
makes 1 cookie sheet of goodness
Dough:
1 1/4 tsp yeast in 1/4 C. of  warmed, unsweetened non-dairy milk and 1 Tbsp. of vegan sugar.
1/4 c. of Vegan "butter" of choice (I used an Earth Balance Stick.)
1/2 C. Vegan Sugar (I used coconut sugar.)
2 Flax Eggs (2 Tbsp. flax meal, mixed with 6 Tbsp. of hot water, set aside to thicken, will get egg-like)
1 C. non-dairy milk (I used unsweetened almond milk)
2-3 C. of gluten free flour mix ( I use a Whole Foods blend that is awesome!) 
1 Tsp Xantham Gum or Guar Gum (optional)
4-5 cups of fruit (I used half blueberries and half strawberries.)
Struesel Topping:
1/2 C. GF/vegan Breadcrumbs or Almond meal (I used half of each.)
1/4 C. Vegan sugar
2 Tbsp. Vegan "butter"

Start by mixing the yeast, warm milk and sugar and set aside to proof approx. 5 minutes.
Make sure milk isn't too hot, otherwise your yeast will not proof and your dough will not rise. 
In a stand mixer cream sugar and "butter", add flax eggs to the mixture and beat until smooth. 
If your gluten-free mix has Xantham Gum already in it, omit it from the flour mixture, if not add the Xantham Gum to the flour mix.
Add in non-dairy milk and flour, alternating between the two, until you have a smooth batter. *When making this with regular flour, it will become a soft dough and pull off the sides of the bowl. Gluten-free flour does not do this, and I guarantee if you add flour to this point your dough will be very chewy, if not rock hard.* 
Leave batter in the bowl to raise for about 2 hours. 
Grease and flour a regular sized cookie sheet.
When batter is done rising, spread it evenly into cookie sheet. *Easiest way to do this is get a silicone spatula and a cup of water. If you keep the spatula wet, it will stop the batter from sticking to it and will make the process SO MUCH easier!*
Top batter with fruit.
In a bowl, make your struesel topping-Blend together breadcrumbs, sugar and butter with a fork, until it gets crumbly.
Sprinkle struesel on top of fruit and let raise for another 30 minutes. 
Bake in a Pre-heated 350 degree oven for about 45 minutes to an hour. The crust should be a nice brown color!
Enjoy!!


Saturday, February 23, 2013

Enchiladas 2 ways, and the Ultimate Chocolate Mug Cake

      I have been absent for awhile recently and I don't really have any excuse other than me being lazy. I don't know if its the weather or what but I have been entirely non-productive. Whatever, I need to get rid of the excuses and just get back to work.
      So, this year has been huge for me as far as changing the way I eat and what I put into my body. I successfully quit smoking, have limited my alcohol consumption to two drinks at any given time (mostly wine) and as of a week and half ago I gave up soda. Don't get me wrong, I miss soda, or pop, as us in the Midwest like to call it, and honestly, the withdrawal effects are horrible. I've been cranky, in pain, tired (slept til noon today, NOON!!), and just plain uncomfortable.
      Now, there are two things that are going on here. 1) My body is detoxing from all the sugar, or b) my body is detoxing from the lack of caffeine. I don't know which it is, but I'm going to be completely forthcoming here. I don't know how long I can go without drinking a Coke. I know there will be a point where I'm going to want one, and rather than beat myself up about it I'm going to say that it is my "treat". We never had soda in my house as a kid, so I think I can keep this up for awhile, but I'm human, and flawed. I'll keep you updated. Anyways, that is my personal health story, as I try to keep it as "real" as possible and let you know how my discovery and journey of getting back to being healthy goes.


      Now here's to what you really want. Just because I haven't been posting does not mean I have not been cooking. I actually have a pile of recipes, and another handful of recipes that I haven't quite figured out (like my chickpea flat bread pizza). As you know, one of my "cravings" while being vegan and gluten-free has been spicy foods, well, salty and spicy. This satisfies both of those cravings. Also, I'm throwing in the BEST, and I really mean BEST gf/vegan mug cake recipe ever. It is soooo good, and it doesn't even taste like it's gf/vegan. First things first though.


       Enchiladas are one food that I have always enjoyed. Pre-veganism I would eat barbacoa ones, chicken ones, and cheese ones, smothered in mole sauce, salsa verde or red sauce, mmmmm! Well, I don't eat any of those things anymore, and even the sauces usually had chicken bouillon in it. Sounds weird, right? Well, in Mexican cooking they use a lot of bouillon. At least that's the way I was taught by my exe's family from Mexico City. Seriously, this white girl can cook Mexican food like nobody's business. My salsa verde is famous among my friends. These enchiladas have all the flavor you would expect from typical ones except they are completely vegan and gluten free! The stuffing is a mixture of spinach, onions, and mushrooms, and you can top them with any enchilada sauce of your choice. It doesn't even have to be homemade.

Spinach and Mushroom Enchiladas with Salsa Verde or Mole
serves 4 people, 3 enchiladas apiece
 Enchiladas
12 corn tortillas
2 C. mushrooms (chopped)
1 C. onions (chopped)
3 C. packed spinach (chopped)
2 cloves garlic (minced)
1 tsp. Mexican Oregano
2 tsp. Bragg's Liquid Amino's
1/8 tsp. Cumin
1/2 C. vegan/gf "cheese" of your choice (optional)
Over medium-high heat cook mushrooms, and onions until water has been reduced and onions are translucent. Add  garlic, spinach and seasonings, cook until spinach has wilted. Set aside.
Mole Sauce
3 dried Pasilla peppers, de-seeded and soaked in 3 cups of hot water.
1/2 C. onion (chopped)
2 cloves garlic (minced)
1 tsp. Mexican oregano
1 Tbsp. cocoa powder or 1 oz of dark chocolate.
1 C. tomato sauce
3 Tbsp. brown rice flour
2 tsp. Bragg's Liquid Amino's
Add everything into a blender and blend on high until smooth and no lumps remain.
Salsa Verde
1 LB tomatillos (outer paper skin removed)
1/2 C. onion 
2 cloves garlic
1 Jalapeno (you can de-seed it for less heat)
2 1/2 cups water
Handful of cilantro
Juice from 1 lime
1 bouillon cube (I use the not-chicken kind that is gf/vegan, available at whole foods and fruitful yield)
salt to taste
 In a saucepan combine tomatillos, onion, garlic, jalapeno and water. Let boil until tomatillos are soft (approx 10-15 minutes). Let cool for a bit then pour into a blender and add the rest of the ingredients and blend until smooth. 

Preheat oven to 350 degrees and in a 9x13 pan spread enough sauce on the bottom to cover it. 
Now from this point you can just heat your tortillas up, so they can become pliable and you can just stuff them, or you can do what I do, which is dip them in some enchilada sauce. Not a lot, just enough to coat them, then you add the filling, roll it up and put it seam side down in the pan. When all are rolled and in the pan, pour the remaining sauce over them and top with chopped onions, vegan cheese and cilantro (or nothing) and cover with foil. Bake for 25-30 minutes and enjoy!


Second recipe is the Ultimate Chocolate Mug Cake, which from start to finish takes about 5 minutes, tops! It's great for when you are having a chocolate or a sweet tooth craving.

Ultimate Chocolate Mug Cake
serves 1
1 Tbsp. + 2 tsp cocoa powder
2 Tbsp. rice flour (white or brown, either works)
1 Tbsp. coconut flour
2 Tbsp. vegan sugar (I use coconut sugar, if you haven't tried it, do so. It's divine!)
1/4 tsp. baking powder
1 Tbsp. coconut oil (melted)
2 Tbsp. applesauce (unsweetened)
3 Tbsp. non-dairy milk (I use unsweetened almond milk)
1/2 tsp. vanilla extract
Combine all ingredients into a mug and mix well. Cook on high in the microwave for 45-60 seconds.
You can also add 1 Tbsp chopped nuts, or vegan chocolate chips to the batter before microwaving. I personally top mine with soy dreamy ice cream. 
Doesn't that look awesome?! Enjoy!!


Sunday, January 27, 2013

Spicy Peanut Thai Noodles

Lately I've been trying to come up with quick and easy Vegan/GF recipes for family, and what I consider easy and what other people consider easy are two different things. This is a quick and easy, I promise! Seriously, the hardest thing is putting together the sauce and cutting up the tofu/ginger/garlic. You can even make the sauce ahead of time and store it in the fridge. I know when you see the recipe you are gonna be like "Whoa, you said easy, that does not look easy." Trust me, it's MUCH easier then it looks.

Spicy Peanut Thai Noodles
Serves 4
1 package rice noodles, cooked according to directions and set aside.
 **I used the super skinny ones because that's all I had at the moment**
Sauce:
1/2 C. natural creamy peanut butter
1/2 C. water
1/3 C. Bragg's Liquid Aminos 
1 Tbsp. lemon or lime juice
2 Tbsp. seasoned rice vinegar
2 Tbsp. sugar or 3 packets of stevia
1 tsp. siracha, or siracha to taste.
****Note: For the last 2 ingredients, I actually use 2 Tbsp. of an all natural sweet chili sauce. I'm going to post a picture of the bottle so you know what it looks like. I found my bottle in a local market that carries international products. I suggest you pick up a bottle if you ever see it, it's very versatile in the kitchen. It also makes a great sweet and sour sauce if you add rice vinegar to it.****


Put all ingredients in a sauce pan and whisk together over low heat until combined. The peanut butter won't really blend with the other ingredients unless its heated. Set aside.

Veggies:
1-2 Tbsp. olive oil (or sesame oil)
1 clove garlic, minced
1-1 inch piece ginger, peeled and minced
1 block extra firm tofu, cubed
1 Tbsp. Bragg's Liquid Aminos
1/3 C. water
1 Tbsp. rice vinegar
1 Tbsp. sugar or 1 1/2 stevia packets
5 cups frozen stir-fry veggies
In a large skillet, heat oil over medium heat, add everything but the veggies and let saute for 5 minutes. Add veggies until cooked to liking (I like mine crisp, so it was about 8 minutes)

Add Peanut Sauce to veggies and let cook until hot. Pour over rice noodles. Serve with garnishes 
 Garnishes:
1/2 c. chopped peanuts
1/2 bunch of cilantro, chopped
1 lime cut into 4 wedges
I eat this hot, but it is also good cold. Don't believe me, try it for yourself!
The Best Chili Sauce and the ingredients are as follows sugar, water, chili, garlic, acetic acid, salt, and xantham gum. 

Spicy Peanut Thai Noodles with garnishes! Delish!!


Tuesday, January 22, 2013

Cinnamon Bundt Cake and Basic Icing Glaze

                I'm gonna make this short because I have been cooking since about 9:30 am and really haven't stopped. Let's just say I did some experimenting in the kitchen, some things worked out but some didn't. So before I post up those recipes, I'm gonna have to play around with them some more. Today's recipe is a dessert, and I really don't post a lot of desserts. Being gf/vegan, you don't really find a lot of desserts that are both, except for *maybe* if they are raw. (Do raw even use foodists use flour?) This one turned out great, which is awesome! The flour/starch list looks intimidating, but honestly, you could probably sub in a gluten-free flour mixture and it would work out the same. Just double check to make sure if there is Xantham Gum in the mix first. If there is, don't add the Xantham Gum. 


Cinnamon Bundt Cake
1/2 c. Sorghum Flour
1/4 c. Soy Flour
1/2 c. Rice Flour
1/2 c Tapioca Flour
1/2 c. Potato Starch
1/4 c. Corn Starch
1 1/2 tsp. Xantham Gum
1 tsp. Salt
2 tsp. Baking Powder
1 1/4 c. Vegan Sugar
1/3 c. Oil
2 tsp. Vanilla Extract
1 c. Non-Dairy Milk
2 Tbsp. Vinegar
1 Tbsp. Cinnamon

Preheat oven to 325. Grease and flour bundt pan.
In a medium bowl combine flours, starches, the Xantham Gum, salt and baking powder, whisk, and set aside.
Mix sugar, oil and vanilla together in a large bowl until smooth.
Add non-dairy milk and vinegar.
Add flour and cinnamon. 
Pour into prepared Bundt pan.
Bake for 1 hour, or until toothpick comes out clean.
Let cool.

While cake is cooling make icing. Super easy go-to icing for anything from cakes to cookies.

Basic Icing Glaze
1 Tbsp. Earth Balance or Coconut Oil
1 c. Vegan Confectioners Sugar
1/2 t. Vanilla Extract
2 Tbsp. Non-Dairy Milk

In small saucepan, melt Earth Balance/Coconut Oil.
Add confectioners sugar, vanilla, and non-dairy milk.
Whisk until smooth.

Pour icing over cooled cake. If you like you can also dust cinnamon on top.